Growing cannabis at home can be a fulfilling and rewarding experience, particularly for small-scale home growers. Once the plants have reached the desired maturity during the flowering stage, the next crucial step is drying and curing cannabis buds. In this article, we will guide you through the process of DIY drying cannabis at home, ensuring optimal results for your small-scale cultivation.
Firstly, here’s a list of equipment needed for drying cannabis at home on a small scale, keeping budget considerations in mind. I’ve included a couple of different options for each item:
Drying Rack/Line
- DIY Clothesline: A simple and cost-effective option is to repurpose a clothesline by hanging branches upside down using clothespins or bulldog clips.
- Collapsible Drying Rack: These racks are designed specifically for drying plants and come in various sizes. They are portable, easy to set up, and budget-friendly.
Drying Space
- Closet: Utilize a spare closet by removing any clothes and ensuring adequate ventilation. Hang the drying rack inside or use hangers with clips to hang the branches.
- Drying Tent/Tent Kit: These mini grow tents provide an enclosed space with ventilation and light-blocking capabilities. They come in various sizes and price ranges.
Thermometer and Hygrometer
- Digital Hygrometer/Thermometer: These affordable devices display both temperature and humidity levels, allowing you to monitor the drying environment accurately.
- Analog Hygrometer/Thermometer: Traditional options provide temperature and humidity readings and can be a more budget-friendly alternative.
Air Circulation
- Oscillating Fan: An oscillating fan helps maintain consistent airflow, preventing moisture buildup and promoting even drying. Opt for a compact fan suitable for the size of your drying space.
- Clip-on Fan: A small clip-on fan can be attached to the drying rack or tent frame, providing targeted airflow at a lower cost.
Humidity Control Options
- Silica Gel Packs: Silica gel packs help absorb excess moisture in the drying environment. They are affordable and can be reused by drying them out periodically.
- Dehumidifier: If you live in a particularly humid area, investing in a small dehumidifier can help control humidity levels. Look for budget-friendly options with appropriate capacity for your cannabis drying space.
Light Control
- Blackout Curtains: Affordable blackout curtains can help block out light from windows if your cannabis drying space is in a room with natural light sources.
- Reflective Mylar Blankets: Reflective mylar blankets can be hung to block light from entering the drying space. They are inexpensive and offer good light-blocking properties.
Storage
- Canning Jars: Once you’ve completed your drying, you’ll want to store in containers that maintain freshness, and glass can jars are normally abundant in any household with food preservation already in mind.
- Food containers: If you don’t have any glass jars on hand, then a rubbermaid bin or simple tin will do fine. You may want to vacuum seal anything you won’t smoke for a few months to preserve freshness.
Next, we discuss optimal process for drying on a small scale at home:
Harvesting Cannabis at the Right Time
Before diving into the drying process, it’s important to ensure that you harvest your cannabis plants at the right time. Observe the trichomes on the buds, looking for a milky or cloudy appearance with a few amber-colored trichomes. This indicates the peak ripeness of the plant, providing the highest cannabinoid and terpene content.
Preparing the Drying Space
Select a suitable area in your home to dry the cannabis buds. A dark, well-ventilated room with a controlled temperature and humidity is ideal. You can repurpose a closet, spare room, or even a dedicated drying tent. Ensure that the space is secure and protected from light, as exposure to light can degrade the potency of the buds.
Harvesting and Trimming
Using clean, sharp pruning shears or scissors, cut each branch of the cannabis plant individually. Remove the leaves, focusing on the larger fan leaves. However, it is advisable to leave small leaves near the buds intact, as they contain valuable trichomes that contribute to the flavor and potency of the final product.
Hanging the Buds to Dry
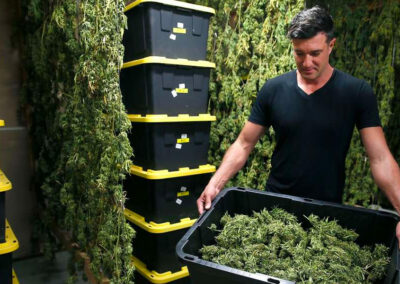
Take each branch of the plant and gently hang them upside down, preferably from drying racks or strings. Make sure to leave enough space between branches for adequate airflow. This hanging method allows for uniform drying and prevents the buds from developing mold or powdery mildew on plants.
Controlling Temperature and Humidity
Maintaining proper temperature and humidity levels is crucial for the drying process. Aim for a temperature between 60-70°F (15-21°C) and a relative humidity (RH) of 45-55%. Use a thermometer and hygrometer to monitor these levels. If necessary, you can incorporate a small fan to ensure good airflow, preventing the formation of mold or moisture pockets.
Patience and Air Circulation
Be patient during the drying process, as it typically takes around 7-10 days for the buds to dry completely. Avoid the temptation to rush the process by increasing the temperature, as this can lead to a harsh and less flavorful final product. Gentle air circulation helps maintain a consistent drying process, but avoid direct airflow that could excessively dry the buds.
Curing for Enhanced Flavor
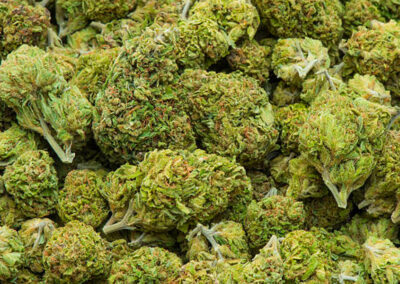
After the buds have dried, it’s time for the final step: curing. Place the dried buds in glass jars or airtight containers. Open the containers briefly once or twice a day to release any excess moisture and allow fresh air to circulate. This cannabis curing process typically lasts for at least two weeks, but many cultivators prefer longer curing periods (four to eight weeks) for enhanced flavor and smoother smoke.
Enjoying the Fruits of Your Labor
Once the buds have completed the curing process, they are ready for consumption. Store them in a cool, dark place, away from direct sunlight and excessive heat. Properly dried and cured cannabis offers the best flavor, potency, and overall quality for your enjoyment.
Drying and curing cannabis at home is an important step for small-scale home growers. By following these DIY methods, you can ensure the preservation of flavor, potency, and quality in your homegrown buds. Remember to be patient, maintain proper temperature and humidity levels, and allow for adequate airflow during both the drying and curing stages. With a little attention to detail, you can savor the fruits of your labor and enjoy a rewarding homegrown cannabis experience.


